How to Get Started With Zapier for Free: Build Your First Business Automation
If you’re a Salesforce professional, or someone looking to break into the Salesforce ecosystem, learning how to automate business processes and connect different applications is a skill worth developing.
One of the easiest ways to get started is with Zapier.
Zapier is an automation platform that connects thousands of applications, allowing you to automate repetitive tasks and build workflows without needing to write code.
The best part? You can sign up for Zapier 100% free.
In this guide, I’m going to walk you through creating a free Zapier account and building a simple business automation using Google Forms, Google Sheets, and Gmail.
We’ll use a common business scenario: capturing information from prospective customers and automatically following up with them.
This is something any business can benefit from, and it’s particularly useful if you’re a freelancer looking to generate and manage your own leads.
By the end, you’ll have built a simple lead capture and follow-up process while learning some of the fundamentals of automation and application integrations.
Reading the content below this video will be really helpful in your overall understanding of how to use Zapier, but you can also follow along with the video and build the exact same automation for yourself right now for free and then expand it as you would like!
What is Zapier?
Zapier is a platform that allows different applications to communicate with one another.
Think about how many applications a business uses throughout the day. There might be a CRM to manage customers, a marketing platform to manage campaigns, spreadsheets to organize information, email applications for communication, and countless other tools.
Often, information needs to move between these applications.
Without automation, someone might need to manually copy information, send notifications, update records, or perform other repetitive tasks.
Zapier allows you to automate many of these processes.
For example:
- When someone fills out a contact form, automatically add their information to a spreadsheet.
- When a new lead comes in, send an automated follow-up email.
- When a prospect requests information, send their details to a CRM.
- When a new customer is added, trigger a process in a marketing automation platform.
These automated workflows are called Zaps.
What is a Zap?
A Zap is an automated workflow that connects two or more applications.
Every Zap starts with a trigger and then performs one or more actions.
Trigger: Something happens in an application that starts the automation.
Action: Something happens as a result of that trigger.
For example, someone fills out a contact form on your website.
That information is captured in a spreadsheet, which triggers Zapier to send an automated email to the person who submitted the form.
Instead of manually monitoring the form, copying information, and sending individual emails, the process happens automatically.
Once you understand triggers and actions, you understand the foundation of how Zapier works.
Step 1: Create a free Zapier account
Getting started is straightforward.
Visit Zapier and create a free account.
You can sign up using your email address or Google Account.
Once you’ve created your account, you’ll have access to the Zapier dashboard, where you can explore applications, create automations, and manage your existing Zaps.
Zapier offers several subscription levels, including a free plan.
The free plan is a good starting point for learning because it allows you to experiment with automation without committing to a paid subscription.
At the time of writing, the free plan includes 100 tasks per month and supports basic two-step Zaps.
There are limitations, but you can accomplish quite a bit while learning the fundamentals.
Step 2: Understand the business process we’re building
Before jumping into Zapier, let’s take a moment to understand what we’re actually trying to accomplish.

Imagine you’re a Salesforce freelancer.
You have a website where prospective clients can learn about your services and submit an inquiry if they’re interested in working with you.
Someone visits your website, fills out a contact form, and provides some basic information about themselves and the services they’re looking for.
What happens next?
You want to make sure their information is captured somewhere, and ideally, you want to follow up with them as quickly as possible.
You could manually review your submissions and send everyone an email, but that becomes increasingly time-consuming as your business grows.
Instead, we’re going to build a simple automated process.
Here’s what we’re building:
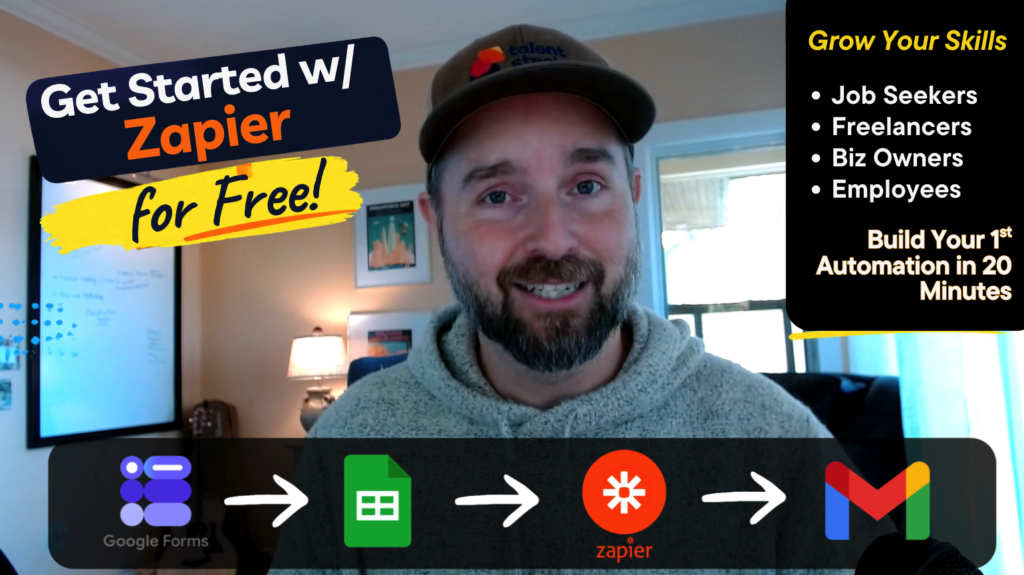
Google Forms → Google Sheets → Zapier → Gmail
Each application has a specific responsibility.
Google Forms: Collect information from prospective customers.
Google Sheets: Store the information submitted through the form.
Zapier: Detect new submissions and initiate the follow-up process.
Gmail: Automatically send an email to the person who submitted the form.
For this exercise, we’re using Google Forms as our lead generation form. In a real business, that form could live directly on your website or be part of another application entirely.
The important thing is that we’re capturing information and making it available to Zapier.
Step 3: Create your lead generation form
Start by visiting Google Forms and creating a new form.
Give it a title such as:
Let’s Talk About Your Salesforce Project
For this exercise, let’s collect the following information:
- First Name
- Last Name
- Email Address
- Company Name
- What type of help are you looking for?
For the final question, you could create a dropdown with a few options:
- Salesforce Administration
- Salesforce Development
- Salesforce Consulting
- Salesforce Integration
- Other
You could collect additional information, but let’s keep things relatively simple for now.
Once your form is ready, submit a test response so you have some information to work with.
Step 4: Connect Google Forms to Zapier
Head over to Zapier and create a new Zap.
For our trigger, select Google Form.
Choose the trigger event that detects a new form entry.
Connect your Google account and select the Form you just created.
You’ll also need to select the appropriate Form.
Test the trigger.
Zapier should retrieve the test submission you created earlier.
You should now be able to see the information collected through Google Forms, including the person’s name, email address, company, and the type of assistance they’re looking for.
This is important because Zapier now has access to that information and can use it in subsequent actions.
Step 5: Create an automated email with Gmail
Now let’s do something useful with the information we’ve collected.
Add Gmail as an action in your Zap.
Select the option to send an email and connect your Google account.
You’ll need to configure a few fields:
To: Select the email address collected through Google Forms.
Subject: Give your email a relevant subject line.
Body: Write the email you want to send.
For example:
Subject: Thanks for reaching out!
Hi [First Name],
Thanks for reaching out! I appreciate you taking the time to tell me a little about your Salesforce project.
I’ve received your information and will review the details you provided.
I’ll be in touch shortly to learn a little more about what you’re looking for and how I might be able to help.
Thanks again!
[Your Name]
The first name can be dynamically populated using the information retrieved from Google Sheets.
You can also customize the email with other information from the form, such as the company name or type of service requested.
Once you’ve configured the email, test the action.
You should receive an email containing the information from your test submission.
Turn on your Zap, and you’re done!
You’ve just built a simple lead capture and follow-up process.
Whenever someone submits your form, their information will be captured in Google Sheets and Zapier will automatically send them an email.
What else could you do with this information?
Here’s where things get interesting.
We’ve built a relatively simple automation, but the possibilities don’t end with sending an email.
Think about what we’ve accomplished.
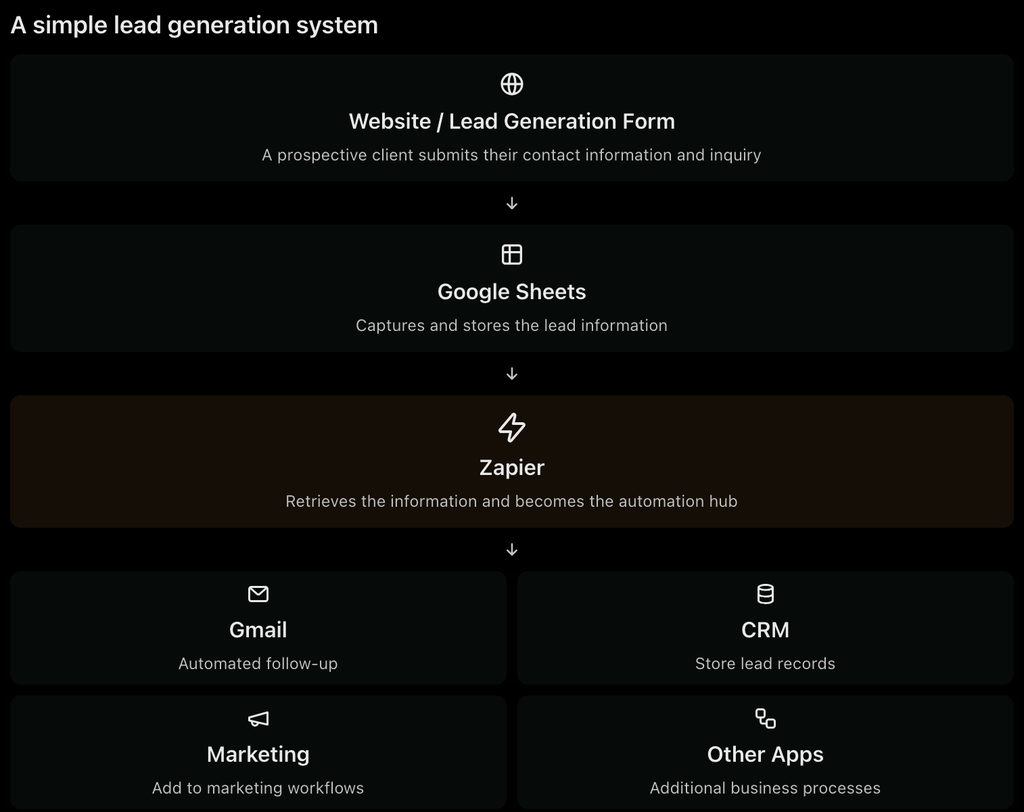
We’ve created a way to collect information from prospective customers, store that information in a structured format, and make it available to Zapier.
Now we can use that information to trigger all sorts of other processes.
For example:
Connect to Salesforce
Instead of keeping your leads in Google Sheets, you could automatically create new Lead records in Salesforce.
Every time someone submits your form, a new record could be created with their name, email address, company, and other information.
Connect to a marketing automation platform
You could send that information to a marketing platform and add the person to an appropriate email sequence based on the services they’re interested in.
Send notifications
You could notify yourself or your team through Slack, Microsoft Teams, or another communication application whenever a new lead comes in.
Introduce conditional logic
You could evaluate the information someone submits and determine what should happen next.
For example, someone looking for Salesforce Development services might receive a different email than someone looking for Salesforce Administration support.
You could also route leads to different people, create different tasks, or trigger entirely different workflows depending on the information provided.
Connect to other applications
There are thousands of applications you could connect to Zapier.
CRMs, project management tools, marketing platforms, databases, communication applications, and much more.
The important thing to understand is that once your information is accessible to Zapier, you’re no longer limited to what one application can do on its own.
Zapier becomes the connection point between these different applications, allowing you to build processes that span your entire technology stack.
What did we actually learn?
This was a relatively simple example, but we covered several important concepts.
Triggers: We used a new Google Sheets row to initiate our automation.
Actions: We used Gmail to send an email based on information collected through our form.
Data mapping: We transferred information between applications and populated email fields dynamically.
Application integrations: We connected multiple applications to create a process that works across different systems.
Business process automation: We took a process that would otherwise require manual work and automated it.
These concepts are useful far beyond Zapier.
The same principles apply when working with Salesforce Flow, integrations, APIs, and other automation platforms.
And that’s really the point of this exercise.
We’re not just learning how to use Zapier. We’re developing an understanding of how businesses use technology, how applications communicate, and how we can automate processes to make businesses more efficient.
Where do you go from here?
If you’re a Salesforce freelancer, you could take what we’ve built here and adapt it for your own business.
Create a lead generation form on your website, capture prospective customer information, and automatically follow up with those leads.
If you’re trying to break into the Salesforce ecosystem, this is a great example of something you can build and demonstrate.
You don’t need to wait until you have a job to start learning how businesses operate or how to use technology to solve business problems.
And if you’re already working in Salesforce, understanding how to connect applications and automate processes can expand the range of problems you’re capable of solving.
Start with the free plan, experiment with different applications, and look for opportunities to automate things you already do manually.
You might be surprised by how much you can accomplish.